INSTALLING A LUGER MAINSPRING By THOR --
This is the way I have been
installing them, takes me about 5 minutes. No jigs, no vices, just a few simple
tools and I don’t even need cuss words any more. Hugh Clark will probably laugh at the
method I have come up with.
Step One.
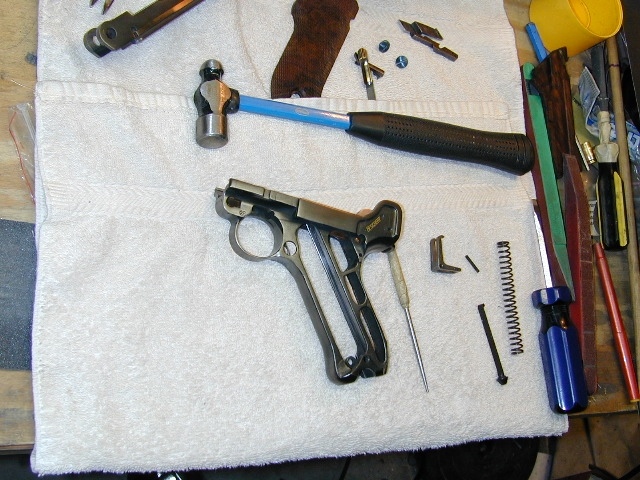
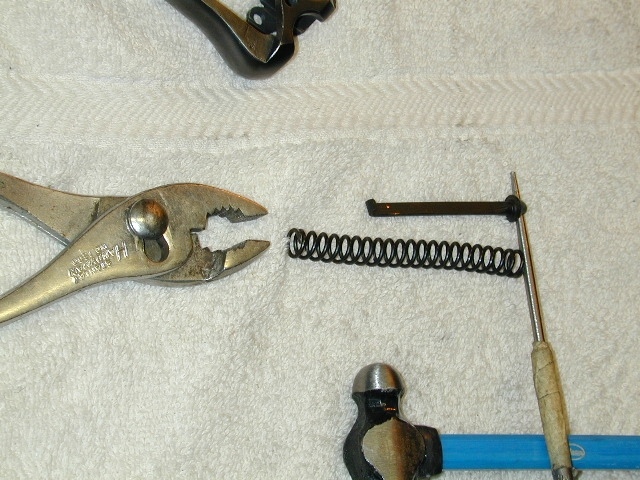
LUGER PARTS: Locate the frame, recoil lever,
recoil lever PIN, main spring and main spring GUIDE ROD.
Next, TOOLS: Pliers,
tapered long pin punch or screw driver shaft that will fit through the guide rod
hole, screw driver
Step Two: The first step to put the recoil lever and recoil lever pin in place, make sure you have the part with the hooks up toward the back of the frame and the part with the CROSS BAR down toward the main spring. This requires the tapered pin punch for alignment of the lever and then a tap of a hammer and a punch to seat the pin.
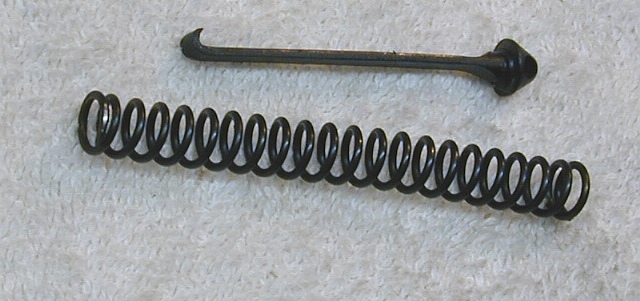
Step Three: Next, locate the main spring and main spring GUIDE ROD. Note the the guide rod has a hook on one end and a truncated cone shape with a hole through it on the other.
Step Four: Locate the main spring, main spring GUIDE ROD, pair of pliers, tapered pin punch. At this point, make SURE to have a pair of SAFETY GLASSES or SAFETY GOGGLES on to protect your eyes. These springs can launch themselves and the rod with MUCH FORCE if they slip!!
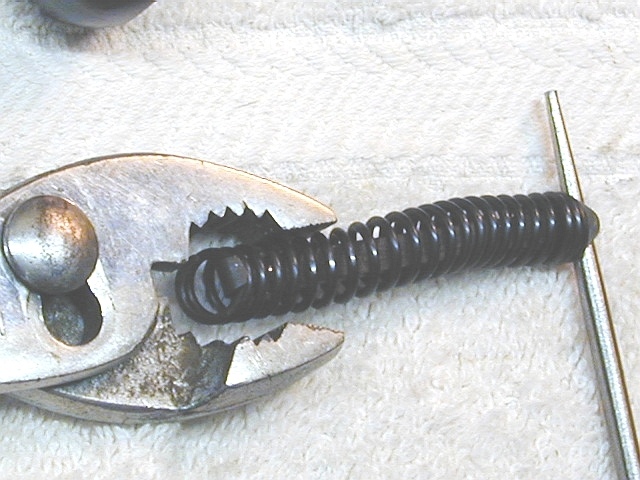
Step five: Okay, you ate your Wheaties right? With the
pliers in one hand GRIP the end of the mainspring with the mainspring, guide and
pliers in the alignment of Step #4. Hold the left end with the pliers PUSH with
determination the guide rod through the middle of the spring using the tapered
rod as a pushing tool until you can hook the end of the guide rod OVER the end
of the compressed main spring!
This is about 1/2 the total physical effort
of the entire installation. Again, wearing your EYE PROTECTION prior to the "Big
PUSH"
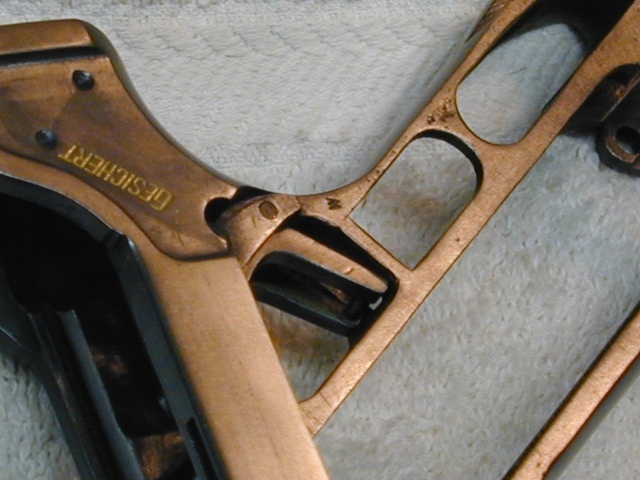
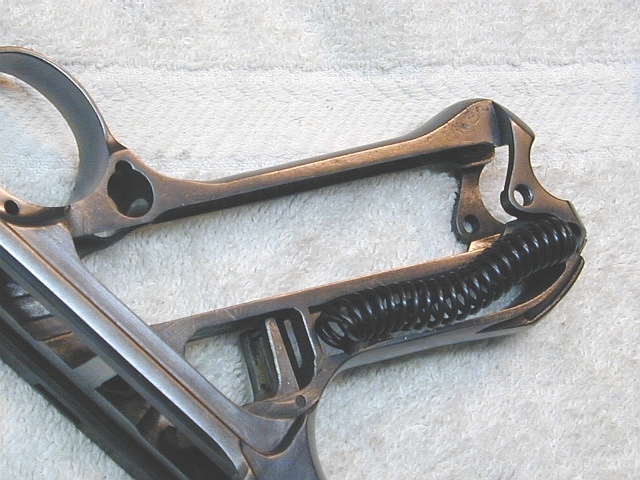
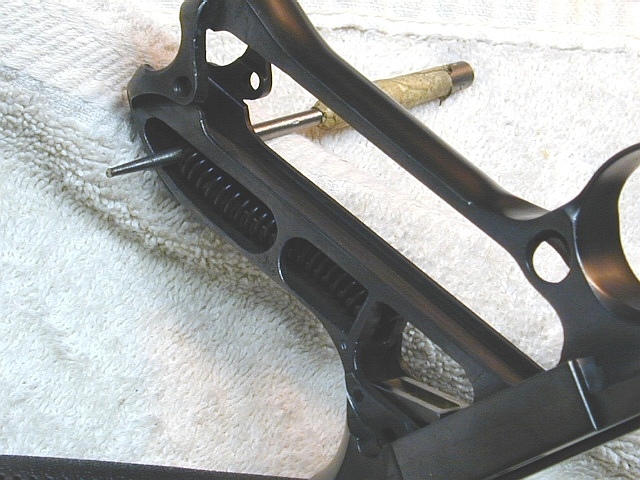
Step Six: WHEW! Alright! Congratulations! Catch your breath and now you can place the hooked end of the spring/guide rod assembly in the frame main spring recess with the hooked end up (left in the photo) and the end of the rod with the hole to the right. The hooked end must go in FIRST and it can go in ONLY on one side of the frame because of how the frame is made, the other side has a small cross piece that prevents in installation from the other side. The picture is not 100% correct as the hooked end must be turned so that when the entire assembly is in the frame the hook of the guide rod will go over the small cross bar on the recoil lever. Note that in this step the right end of the main spring rod is NOT in the frame yet!
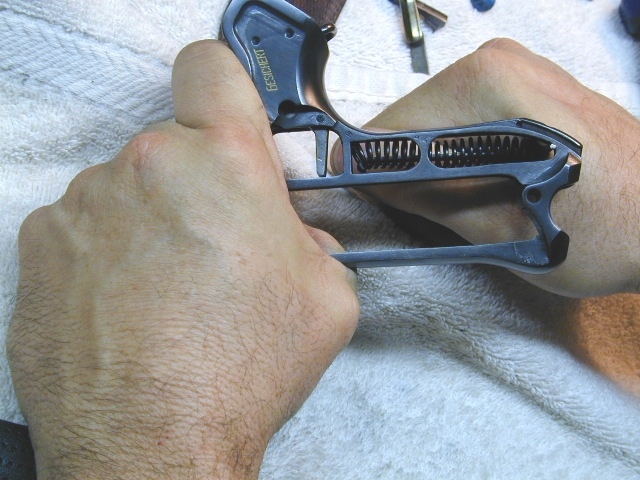
Step Seven: Okay, more fun stuff ahead.
7. With the
frame in one hand and with the tapered pin punch in the other AND with the pin
punch through the end of the spring guide rod, say some cool word like
"Para....ugh.....Para.....bellluuuuuuuuuum" and compress the spring and pop the
end of the guide rod into the frame and release the punch gently. When you
Compress the spring by pushing your hands together you will force the hooked end
of the spring guide rod up into another area of the frame and through a SMALL
hole in the frame partition. At this point the rod and recoil lever are NOT
connected. This entire step is to get the recoil lever AND compressed spring
into the frame.
Step Eight: Now another view of the installation with the recoil spring, guide rod inside the frame now. You almost done! Again, note that the recoil lever and guide rod are NOT connected yet!
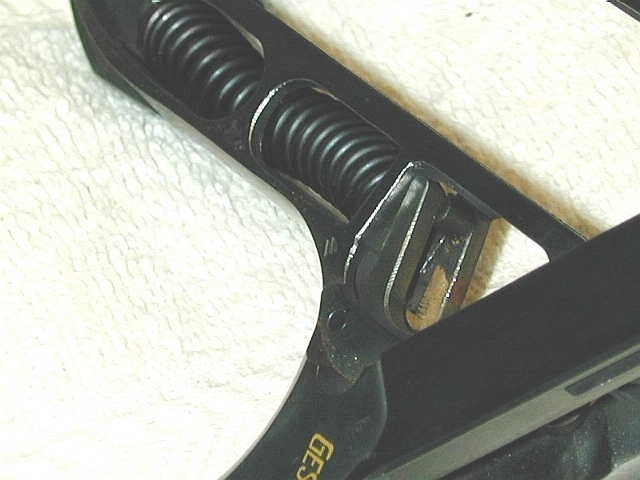
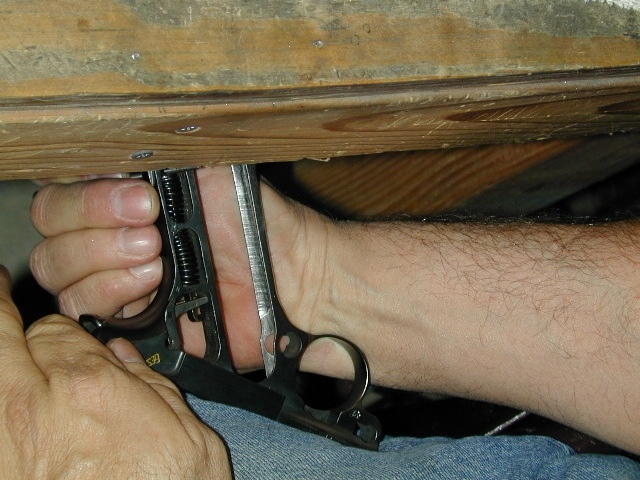
Step Nine: Thor's Trick-This is where my methods
become a little unorthodoxed!!! With the tapered pin punch STILL in the little
hole of the guide rod, I place the frame UNDER the front edge of my WORK bench
and have my other screw driver close by. The pin punch large end is pointing
down to the floor and the smaller end is through the hole in the guide rod and
pointing at the camera (straight up. The small end of the pin punch is placed at
the front of the bench under the bench and up against the front edge from below.
I put my leg on the Luger frame and push the frame TOWARD the bench. This again
compresses the spring and you might have to move the punch slowly back and forth
as it is compressing to get the rod THROUGH the cross bar end of the recoil
lever, the additional screw driver can be used to move the hook end left or
right as needed. Now holding the spring compressed with your leg strength, you
can push the hook end over to one side so that when you release the pressure on
the frame from your leg the spring will decompress and the hook will go over the
end of the recoil lever cross bar.
If this didn’t work the first time, catch
your breath and do it over. Congrats you are done!
Since I have adopted this
method I have never failed to get the spring in the frame in just a few short
minutes. When I started this long ago, I would make the CARDINAL MISTAKE OF
trying to COMPRESS THE SPRING INSIDE THE FRAME!! Took me 1-2 hours at least!
JUST make sure your bench is anchored well or against a solid wall or you will
move it with your leg pressure!
Step Ten: SUCCESS! Here is the installation completed!
AND....I didn’t even invent any NEW CUSS WORDS or skinned my knuckles!!!
Thor